
WORKING WITH LIVE EDGE SLAB WOOD
Salvaged trees provide an incredible resource for beautiful, one-of-a-kind slab furniture creations that serve as sustainable and functional art. Building slab furniture is an extensive process and there are many factors to consider, all contributing to the uniqueness of each project. We cover everything with our clients from how the wood is sourced and sustainably salvaged, to the required drying process, to the criteria for picking out a slab, to the nature of the raw material, to the leveling process, to explaining and expanding on the occurrence of natural wood ‘movement’, and how to best maintain and upkeep the slab once finished.
SOURCING SALVAGED WOOD
We work primarily with salvaged walnut sourced throughout Central California and the Northwest. There are many different species of walnut including black walnut, claro walnut, english walnut, bastogne walnut, and these species can also be grafted. Characteristics will vary between the walnut types. We also work with other salvaged domestic woods when available including (but not necessarily limited to) elm, ash, oak, sycamore, redwood and cedar, and occasionally some exotic hardwoods when a client has provided us with their preferred materials.
ETHICS
Trees need to have particular criteria in order to be removed ethically, including dead-standing or dying/diseased trees, trees that pose hazardous conditions such as roots encroaching on home/property foundations or branches that are deemed dangerous, or fallen trees from wind storms or mudslides, etc. We do not work with materials that are clear-cut from forests and our intentions focus on working with salvaged trees (and FSC-certified lumber for dimensional lumber projects). We work exclusively with a supplier in Northern California who covers all the bases from tree removal, to milling, to drying the slabs.
MILLING AND DRYING
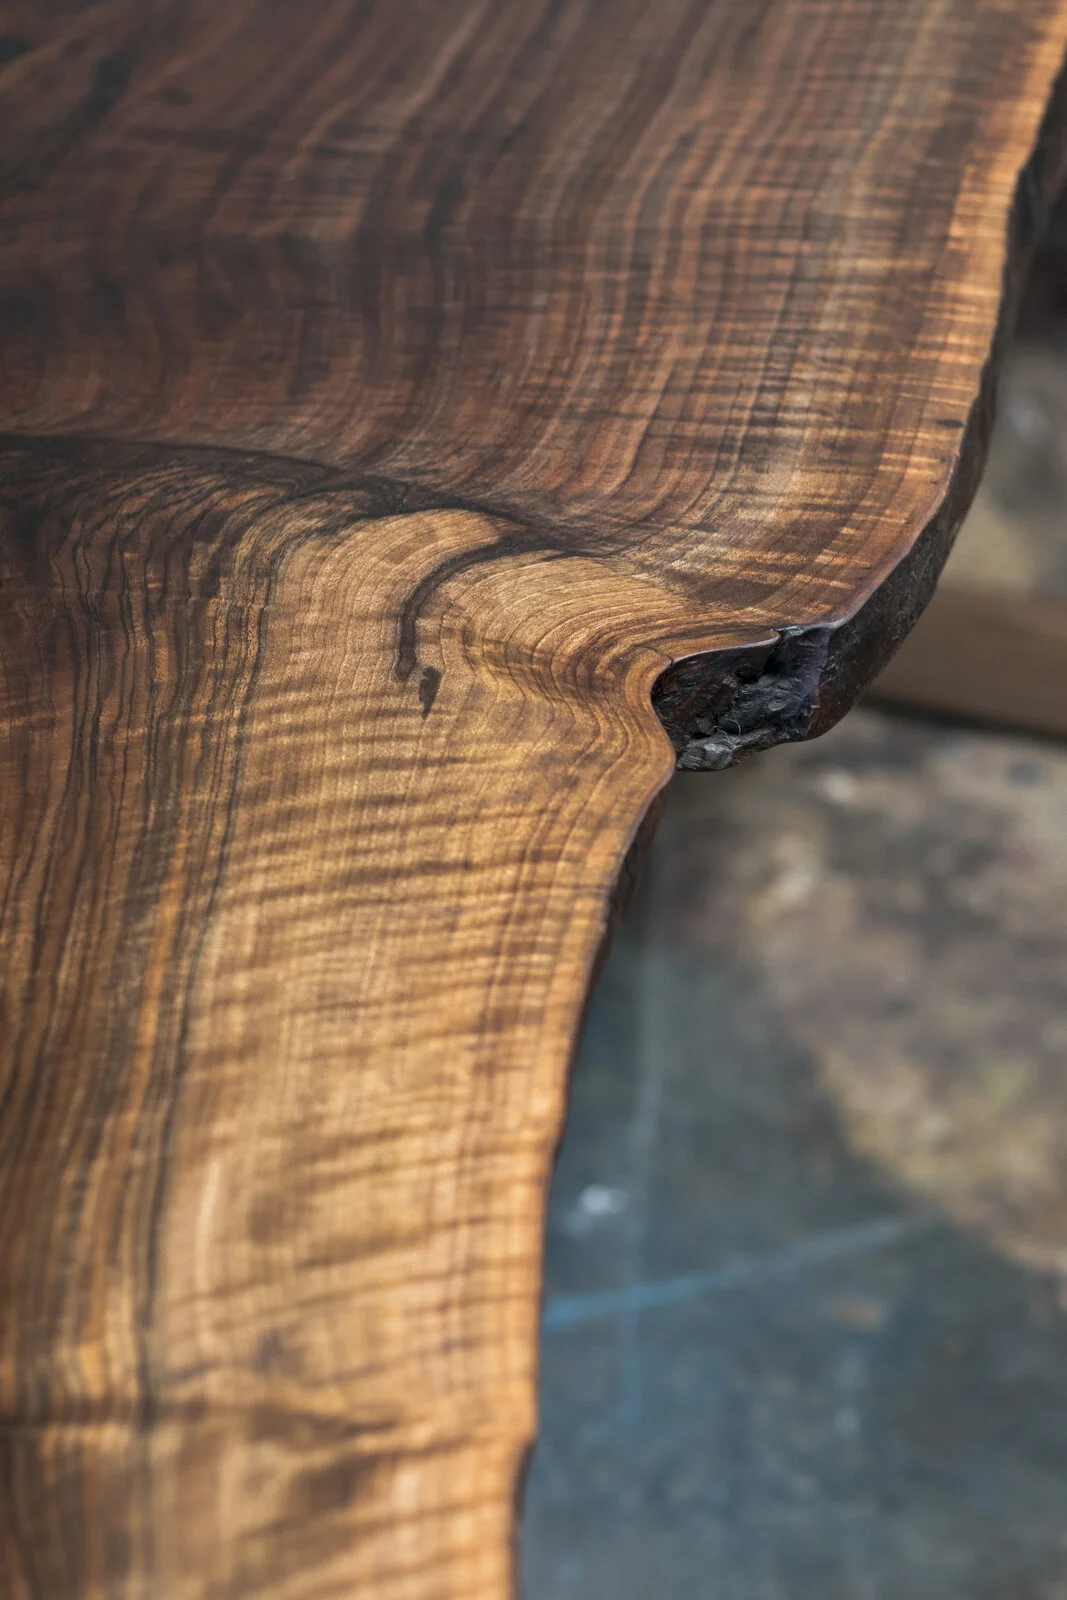
After the tree is cut down, it’s transported to the mill. Using a Wood Mizer bandsaw mill, logs are cut to a desired thickness and left with beautiful live edges. As the wood is slabbed the character develops when grain textures and features are revealed.
Slabs need to be naturally air dried for a minimum of approximately 1 year per inch thick and require additional kiln drying to speed up the drying process and bring the wood to a suitable moisture content to work with (under 10%, ideally 5-7%). Drying the slabs properly and slowly reduces potential issues down the road after the slab has been made into furniture. In their raw state, most slabs we use have been milled to around 3" thick, which generally requires that when we are getting ready to choose a slab for a project, it needs to have already been drying naturally for about 3 years. If the slab has been dried for close to the proper amount of time required and meets the project standards, we will then have it placed in a kiln for anywhere from about 8-16+ weeks to assist with further drying, which is also beneficial to exterminate any insects that may have nested in the wood.
CHOOSING THE RIGHT SLAB FOR THE PROJECT
Most often, our clients are choosing slabs for their project based off a photo of the “raw” slab right after it was milled. The slabs are marked with measurements in chalk indicating the overall length of the slab and varying widths. The shape and overall character of the wood is shown in the photos, however it’s important to understand that once the slab is cut to length, leveled, processed and sealed, it will look entirely different once finished. We also provide notes and feedback about the potential of each option for your project.
Some criteria to consider when picking out your slab includes the following:
MILLED DATE: The older the slab, the drier it is and the sooner we can work with it. Ideal options would be slabs that were milled between 3-5 years ago or older.
DIMENSIONS: When we use a slab for a project it almost always has to be a minimum of 3-4 feet longer in it’s “raw” state than what we’ll actually be cutting it down to for the project. Having more material and a few feet of excess cutoff allows us to select the most desirable section of the slab. For example, if you are looking to have an 8ft table made, we would likely be providing slab options that are over 11ft in length so that we have “cut options”. Additionally, the width is important to consider. Live edges vary considerably in width, so it’s important for us to know the minimum and maximum widths required for each project so as to provide the best options that meet the criteria.
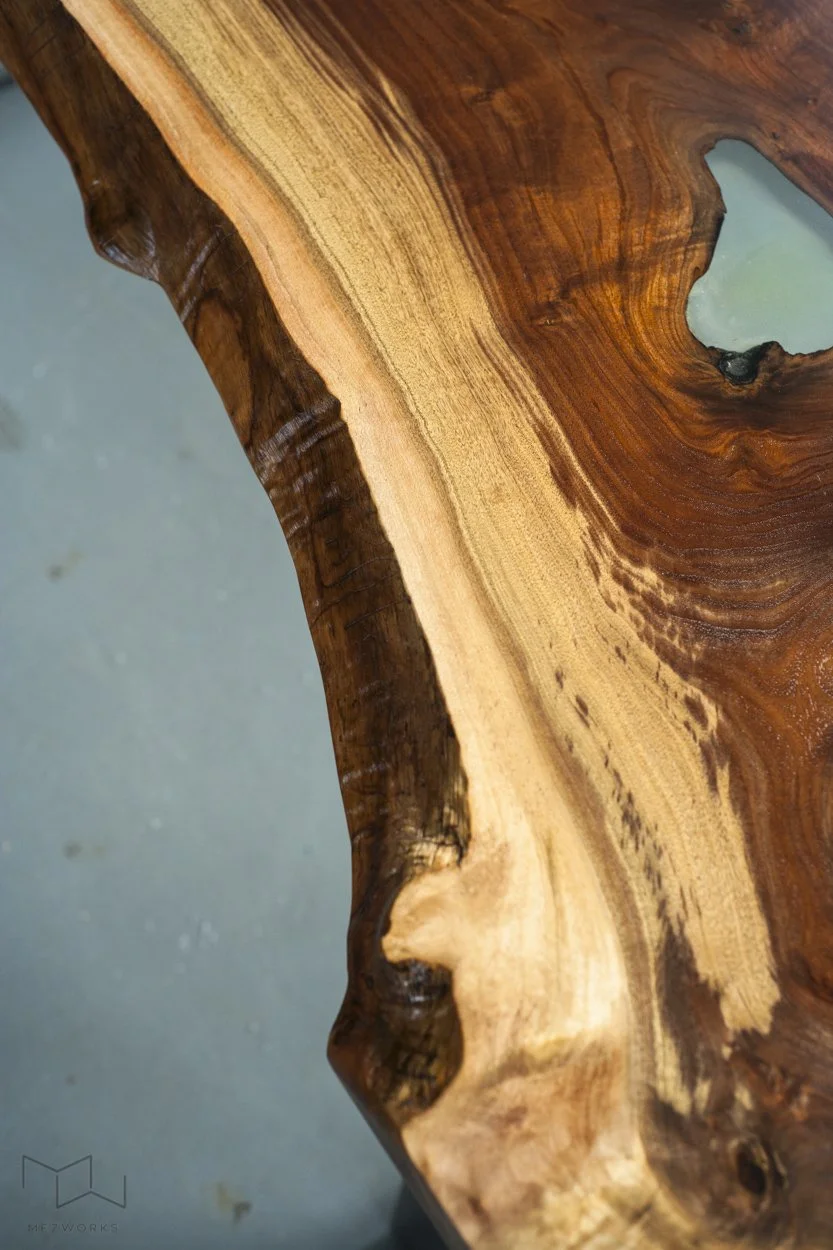
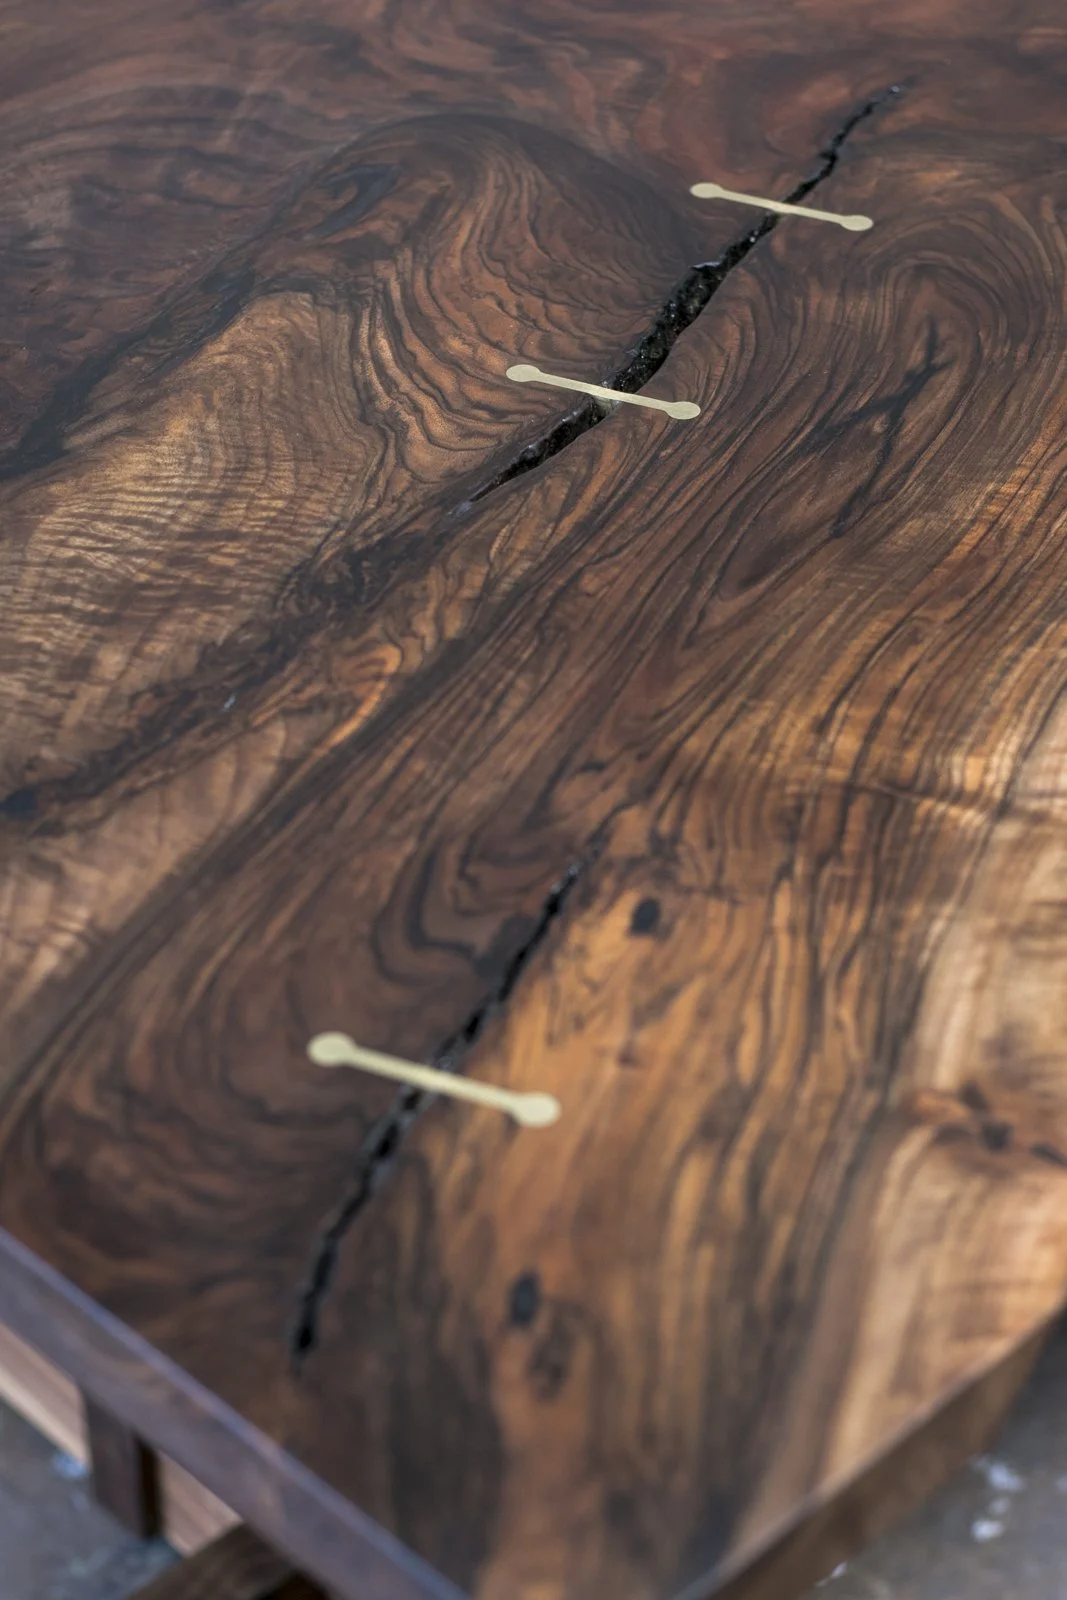
CRACKS/INCLUSIONS/IMPERFECTIONS: The slabs that we provide images of were photographed on the day they were milled, so large cracks are likely to be even larger years down the road and can make the slab unstable to work with, and unrevealed character may develop as the slab dries. We generally avoid slabs that have large cracks that are already visible in the images and span throughout much of the slab. However, cracks are all “workable” features and can be repaired and reinforced. Small cracks are generally fine and are stable and we fill them with a completely clear epoxy resin to keep the crack intact and prevent further splitting. Black epoxy can be filled upon request. In some cases, “bowtie” inlays may be required to further stabilize a crack or inclusion on the bottom and/or top of the slab. Please see the “RESIN-WORK AND INLAYS” section below for a more in-depth explanation and options. Other “imperfections” that are also workable features can include small or large knots, and occasional dryrot or tiny bug holes.
SHAPE: If the slab looks odd shaped in the photo, it's likely to look even odder in person and can be very hard to place seating around! We prefer to work with slabs that seem to have a straighter shape or hourglass figure, with less variance in width.
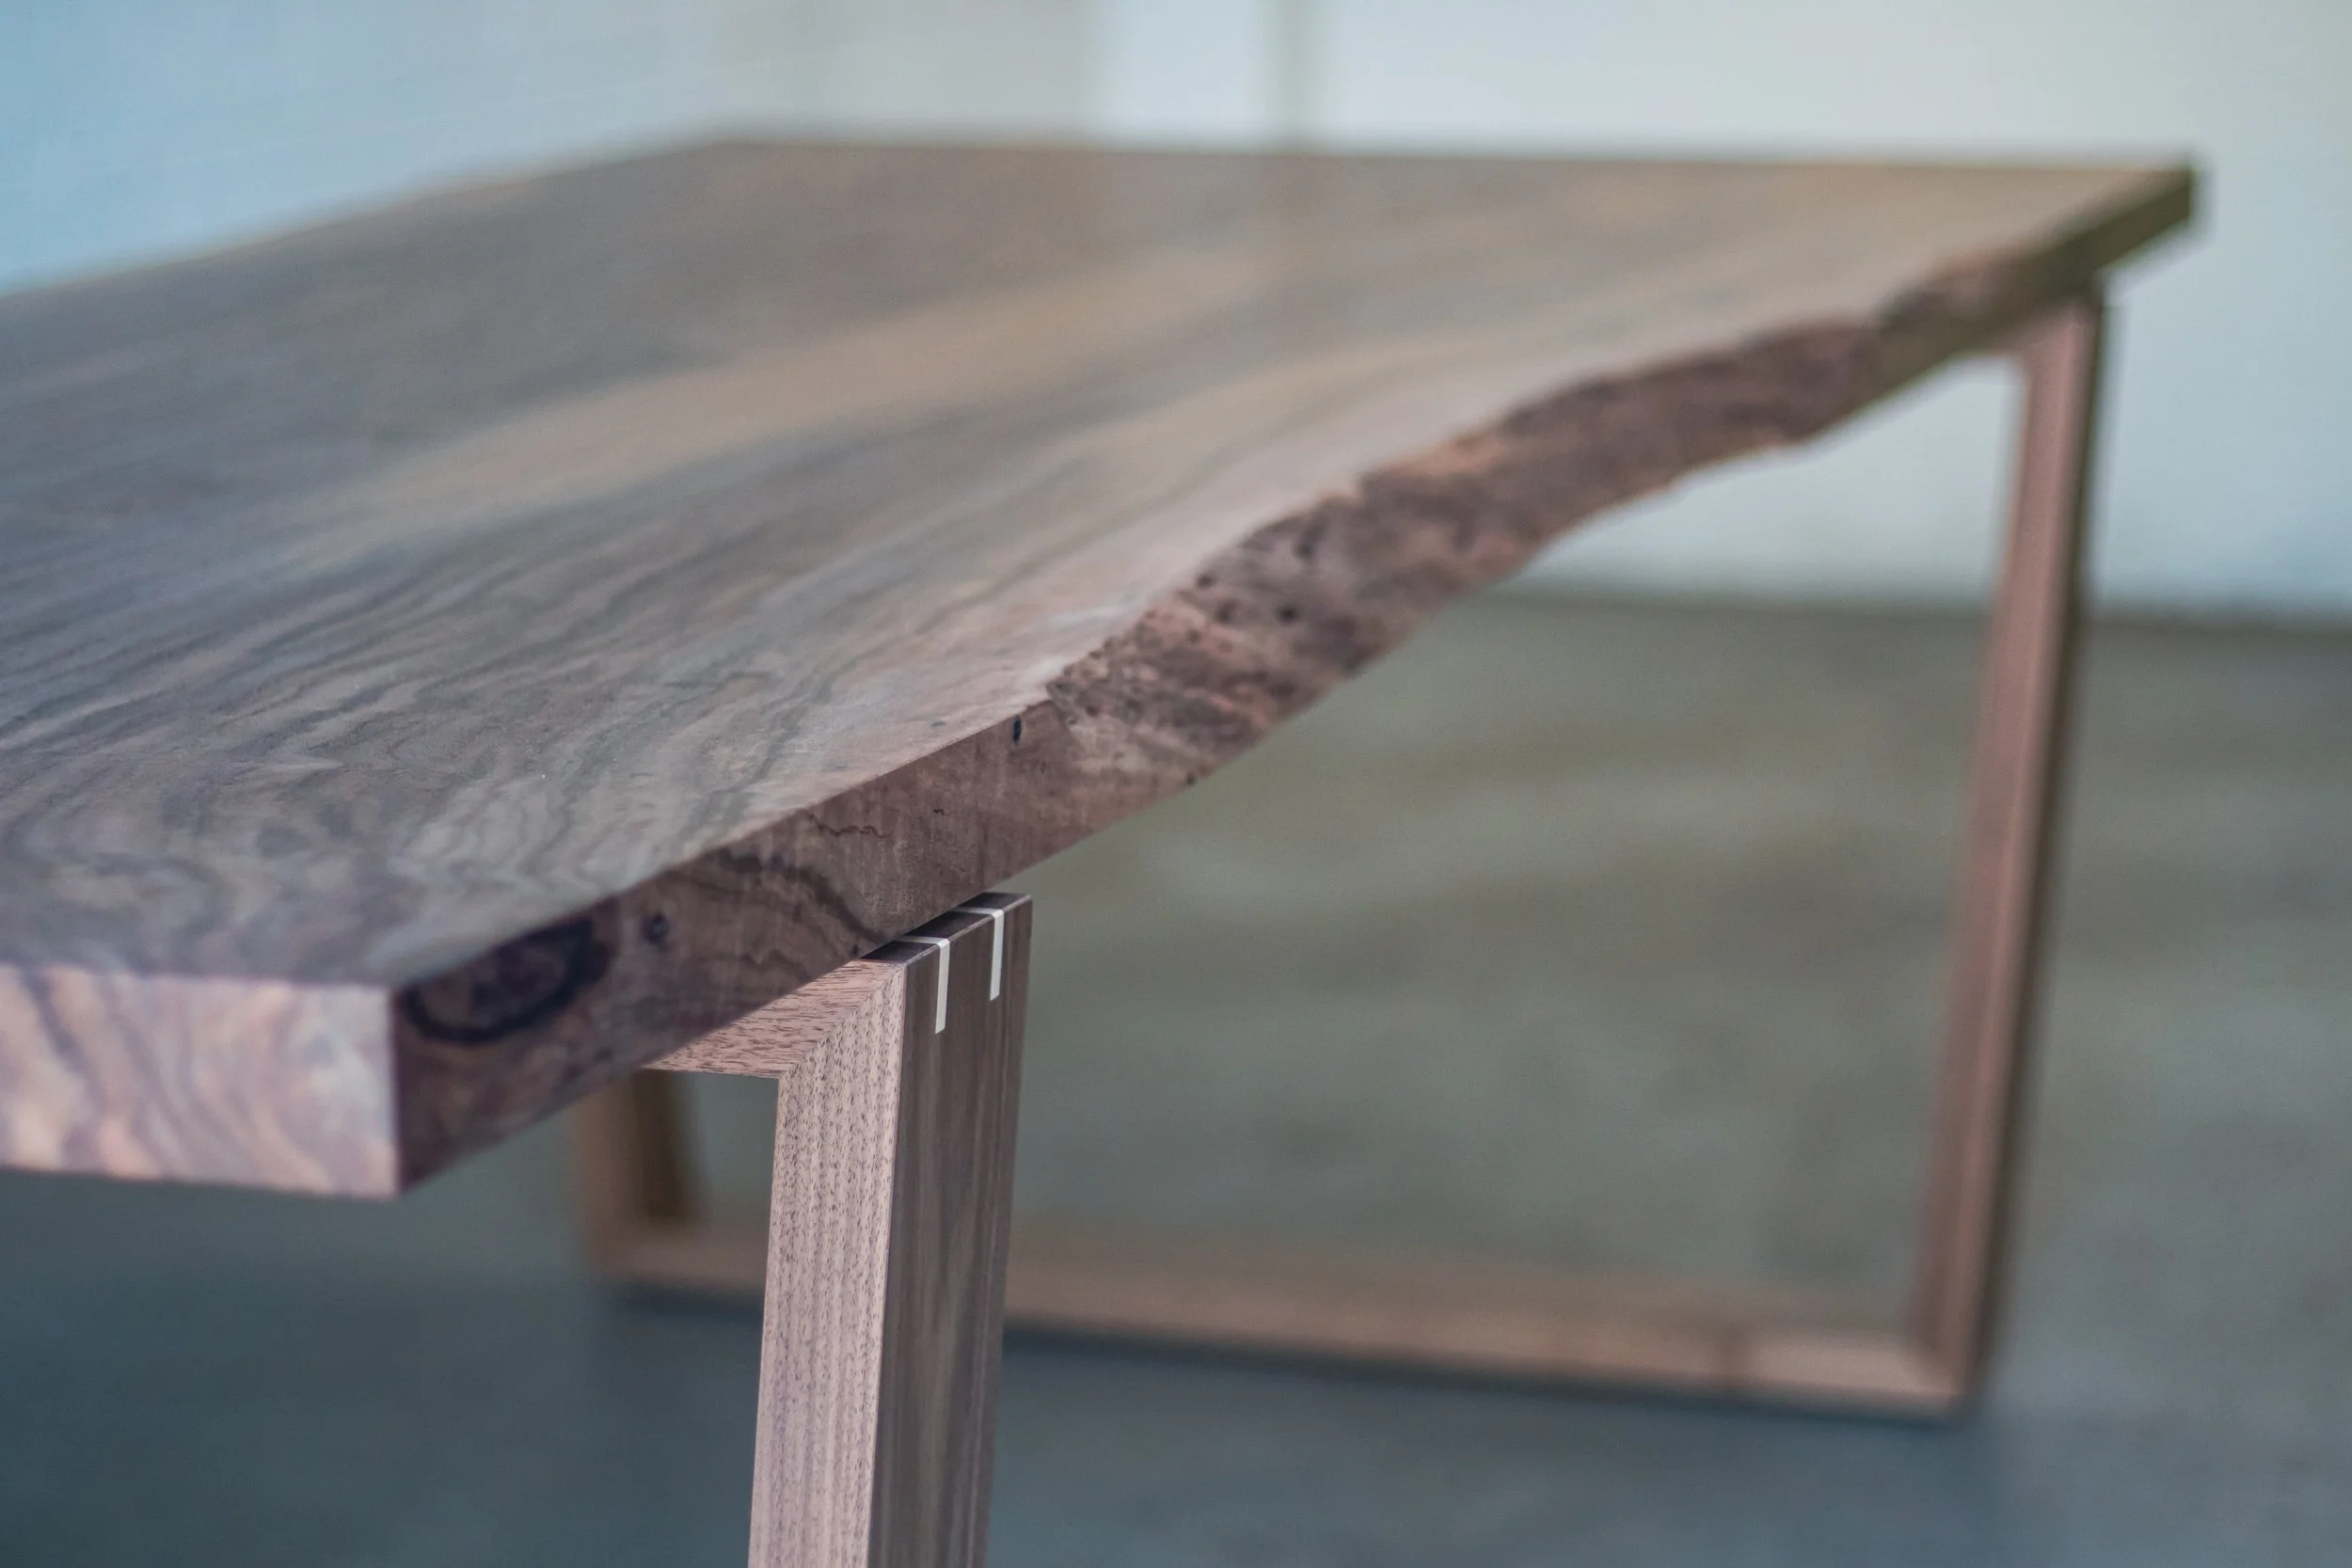
PARTIAL FLAT EDGES: “Flat edges” would refer to sections of the slab where an edge is sawn flat, likely where a branch was cut or where the roots or "crotch" of the tree fanned out before it was cut. Although we can make flat edges look good, if the span is fairly long the outcome can have a very different effect/look than a fully live-edged slab. Sometimes we can "faux" the edge if we are confident we can make it look natural (for smaller sections), and other times we prefer to keep the edge flat if it looks acceptable. Please understand, we prefer not to faux a slab’s edge if it’s not completely necessary for the integrity of the natural slab. The straight-cuts are part of the character of the wood directly from the mill, so we will often try to maintain the look of the slab. Straight edges can also be beneficial to maintain the maximum width that a dining area can accommodate. Below is an example image of how we often approach flat edges and embrace the ‘squareness’.

COLORING: We work mainly with walnut, which can have an array of very different color from slab to slab or tree to tree. In most cases, walnut is medium brown in overall tone with a variation of dark to light tones throughout. Common occurrences of blonde can border the edges, or sweep through the entire slab. ‘Warm” tones are also often prominent, with occasional dark brown or even black/dark gray features throughout the grain. The coloring is not visible until the leveling process is complete and the slab has been finished, and it’s necessary to understand that ahead of time as we cannot control the natural coloring of the wood. There is always going to be an element of surprise with slab wood, so embracing the unknown ahead of time is a must! No two slabs are alike, which is part of the uniqueness of owning a piece of live edge furniture.
LEVELING
This is a very crucial step in the process and must be done slow and calculated to avoid major wood cupping/twisting. We receive the slabs at ~3+” thick in rough/raw shape; they typically have major high/low spots due to the different hardnesses in various parts of the slab, and caked in dirt/dust/debris from being stored outside for a few years drying. Throughout the leveling process we remove ~1/8" from both sides of the slab to equally allow moisture to escape. Over the course of several weeks we repeat the process several times to reduce the amount of wood ‘movement’ the slab will experience. This process can take anywhere from 3-6 weeks, longer if the moisture content is higher than 10%. Slab wood needs to be of proper MC (moisture content) before we can work with the material so as to better ensure the future flatness of the wood. We first rough cut the ends of the slab and then proceed to do the first leveling to open up the wood and further allow more moisture to escape. The initial level is done to remove all of the high/low spots in the wood and opens up the slab allowing it to "breathe". We let the slab "rest" for about 5-7 days after the first level where any excess surface moisture will escape/evaporate. When slabs are leveled, they go into a sort-of state of "shock" and will "move" as they dry. Wood movement is the expansion/contraction of the wood as moisture evaporates often causing the wood to cup or twist a bit. Sometimes additional air-drying times are required between levels. Once the wood reaches under 7-8% MC (measured with a moisture meter), we repeat the leveling process about 3-4 times over the course of a few weeks, depending on what the slab requires, until the slab stops "moving" and is planed down to about 1 1/2-2" thick. Ideally, by this point, the slab reaches our goal MC of 5-7% or less, which is about as dry as slab material can get. After the leveling process is complete we can proceed with the remainder of the build.
The example in the video shows the first “passes” on a claro walnut slab with our router sled which removes the high/low spots on the slab. About 1/8” is removed on each side during each level, with resting days in between to allow the slab to acclimate.
Over the course of a few weeks of leveling the slab, we can then proceed to use our wide belt-sander to further flatten the slab to final thickness.
RESIN-WORK AND INLAYS
All slab projects will require some epoxy-resin work in small cracks/inclusions, so as to keep the cracks from continuing as well as to prevent liquid or food spills from getting lodged into these areas. We can do either a clear resin, or black resin fill.
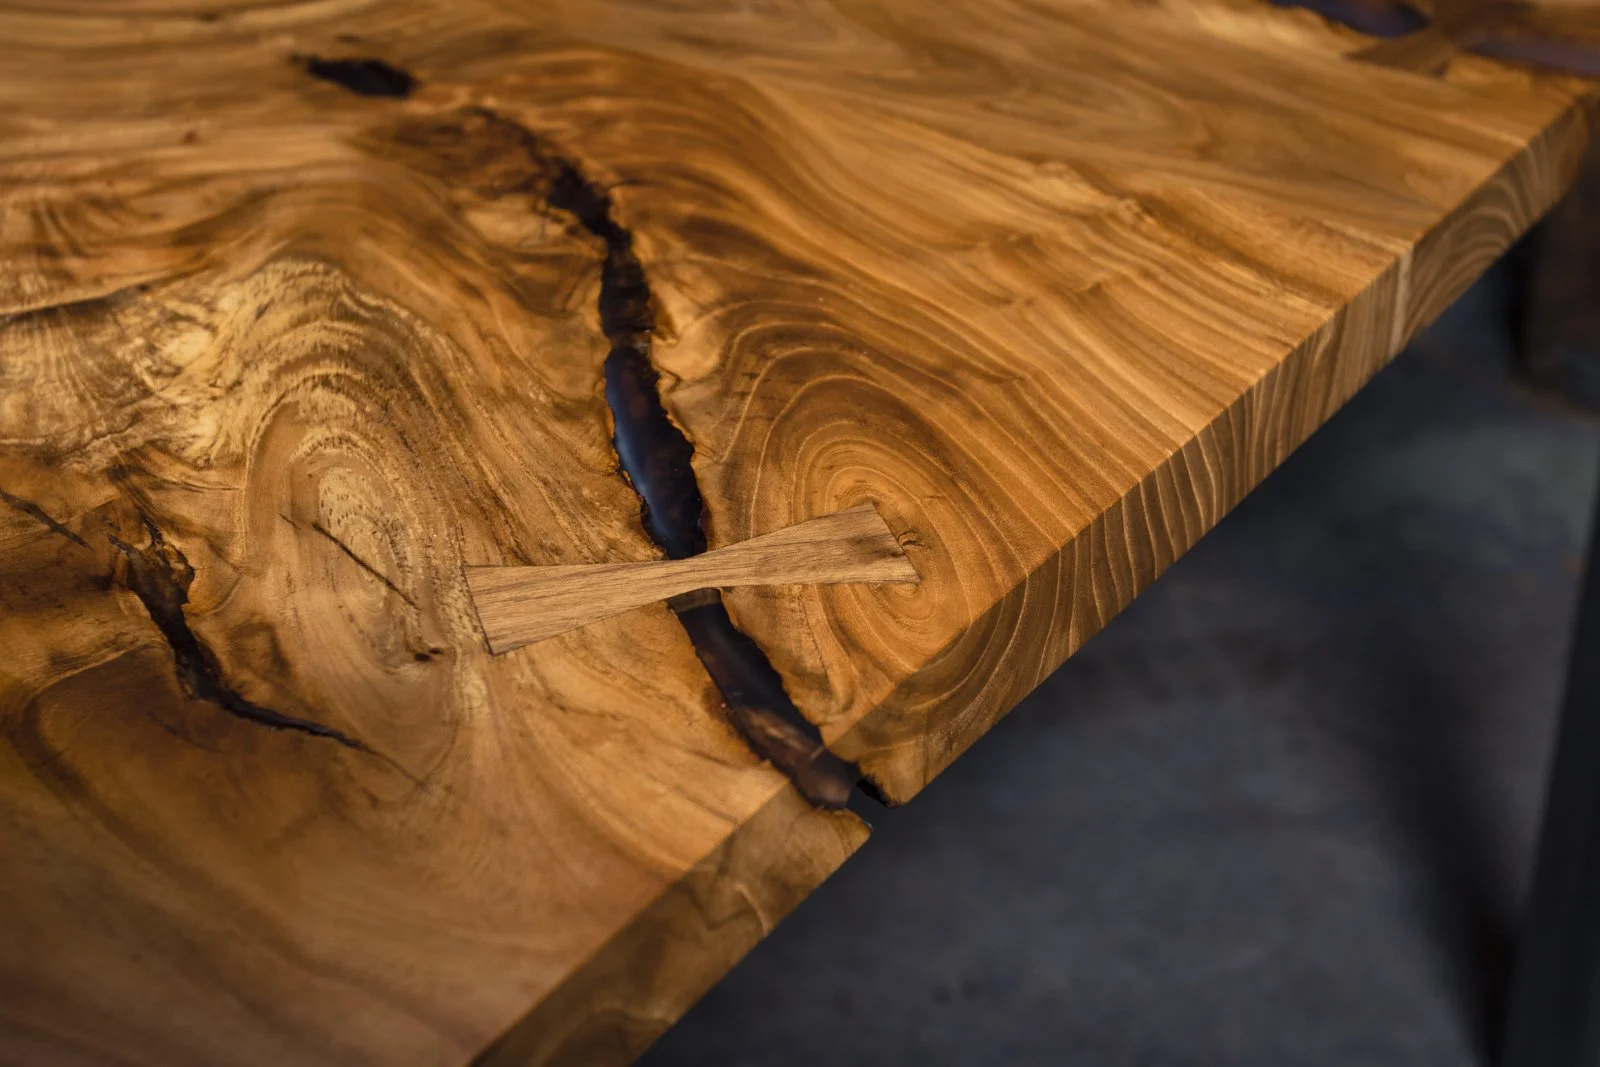
Larger cracks/inclusions may need the addition of structural wood inlays, also called “bowties” or “butterflies”. While we often add them to the bottoms of the tabletops only, sometimes they are necessary to add to the tops as well. We can also add metal inlays in a more ornamental fashion (mainly for the look, not necessarily a structural aspect but they do help a little).
WHAT IS WOOD MOVEMENT?
Wood expands and contracts with seasonal changes in the surrounding humidity and temperature. More humid air will cause wood to expand; drier air will cause wood to contract. This movement is a natural occurrence and all wood furniture, wood flooring and other wood household items will experience movement to a certain degree. Wood movement can be minimized and often go unnoticed when the wood is processed properly. It can never be completely avoided, and even when properly processed there can always be things under the surface that can make movement unpredictable or inevitable. One thing we always emphasize to our clients who choose to own a slab table is that the “imperfections” should be understood embraced, especially since each piece we make is completely unique from one other.
Factors that may effect or increase wood movement include natural direct sunlight exposure to the wood. Homes that have large windows that let a lot of light in that do not have UV protectant film or curtains/shutters/blinds that allow the wood to have repeated sun exposure for several hours a day are more likely to cause wood movement to furniture and flooring. If this occurrence is something that cannot be remedied, then you may expect wood movement to be more prominent and possibly even noticeable.
UPKEEP, CARE & MAINTENANCE
Please visit our ‘Wood Care and Maintenance’ section for details on how to take the best care of your slab wood table.